Let me walk you through a conversation that happens quite often between a customer service representative and a customer...
CSR: “Hello, how may I help you?”
Customer: “Yes, hi! I would like to print some postcards for a mailing and need to get a price.”
CSR: “That’s great! I can help you with that! Let me ask you a few questions so I can get an idea of what you want. What’s the total quantity of the job?”
Customer: “2,000 postcards.”
CSR: “Will the postcards be printed on both sides?”
Customer: “Yes, I would like my card to be printed on both sides.”
CSR: “Does it bleed?”
Customer: I imagine the customer at this moment furrowing his brow or scratching his head and, saying, “ Bleed … uh … what … I’m not sure … I have no idea... what are bleeds!?”
This is normal. You are not alone. Few people understand what bleeds are and why they’re important. But don’t worry, it’s not your fault. We in the mailing industry haven’t done a good job in explaining this concept. So let’s get down to business.
What are bleeds?
What are bleeds? A bleed is any artwork – such as an image or color – that touches the edge of a printed piece. It literally looks like it “bleeds” over. Think of an infinity pool, where the water runs to the pool’s edge, and you’ll have a good idea of what I’m talking about.
Here are two examples that also might help:
- You have a postcard covered in a solid color other than white
- You have a background picture that takes up the entire card.
Why are bleeds important?
To cut to the chase, here’s why bleeds are important: If you don’t add bleeds to your artwork, it will be printed with a thin white box around the outside edge regardless of what your artwork looks like. It will simply not be able to print your color all the way to the edge of the piece, reducing the appearance and appeal it brings in.
So to make your piece bleed, you need to setup your initial artwork bigger than its final size because printers cannot print edge to edge and add bleeds automatically. After we print the piece, we trim the extra off to give it the bleed effect with the color or background falling off the edge.
How do I set up bleeds on my artwork?
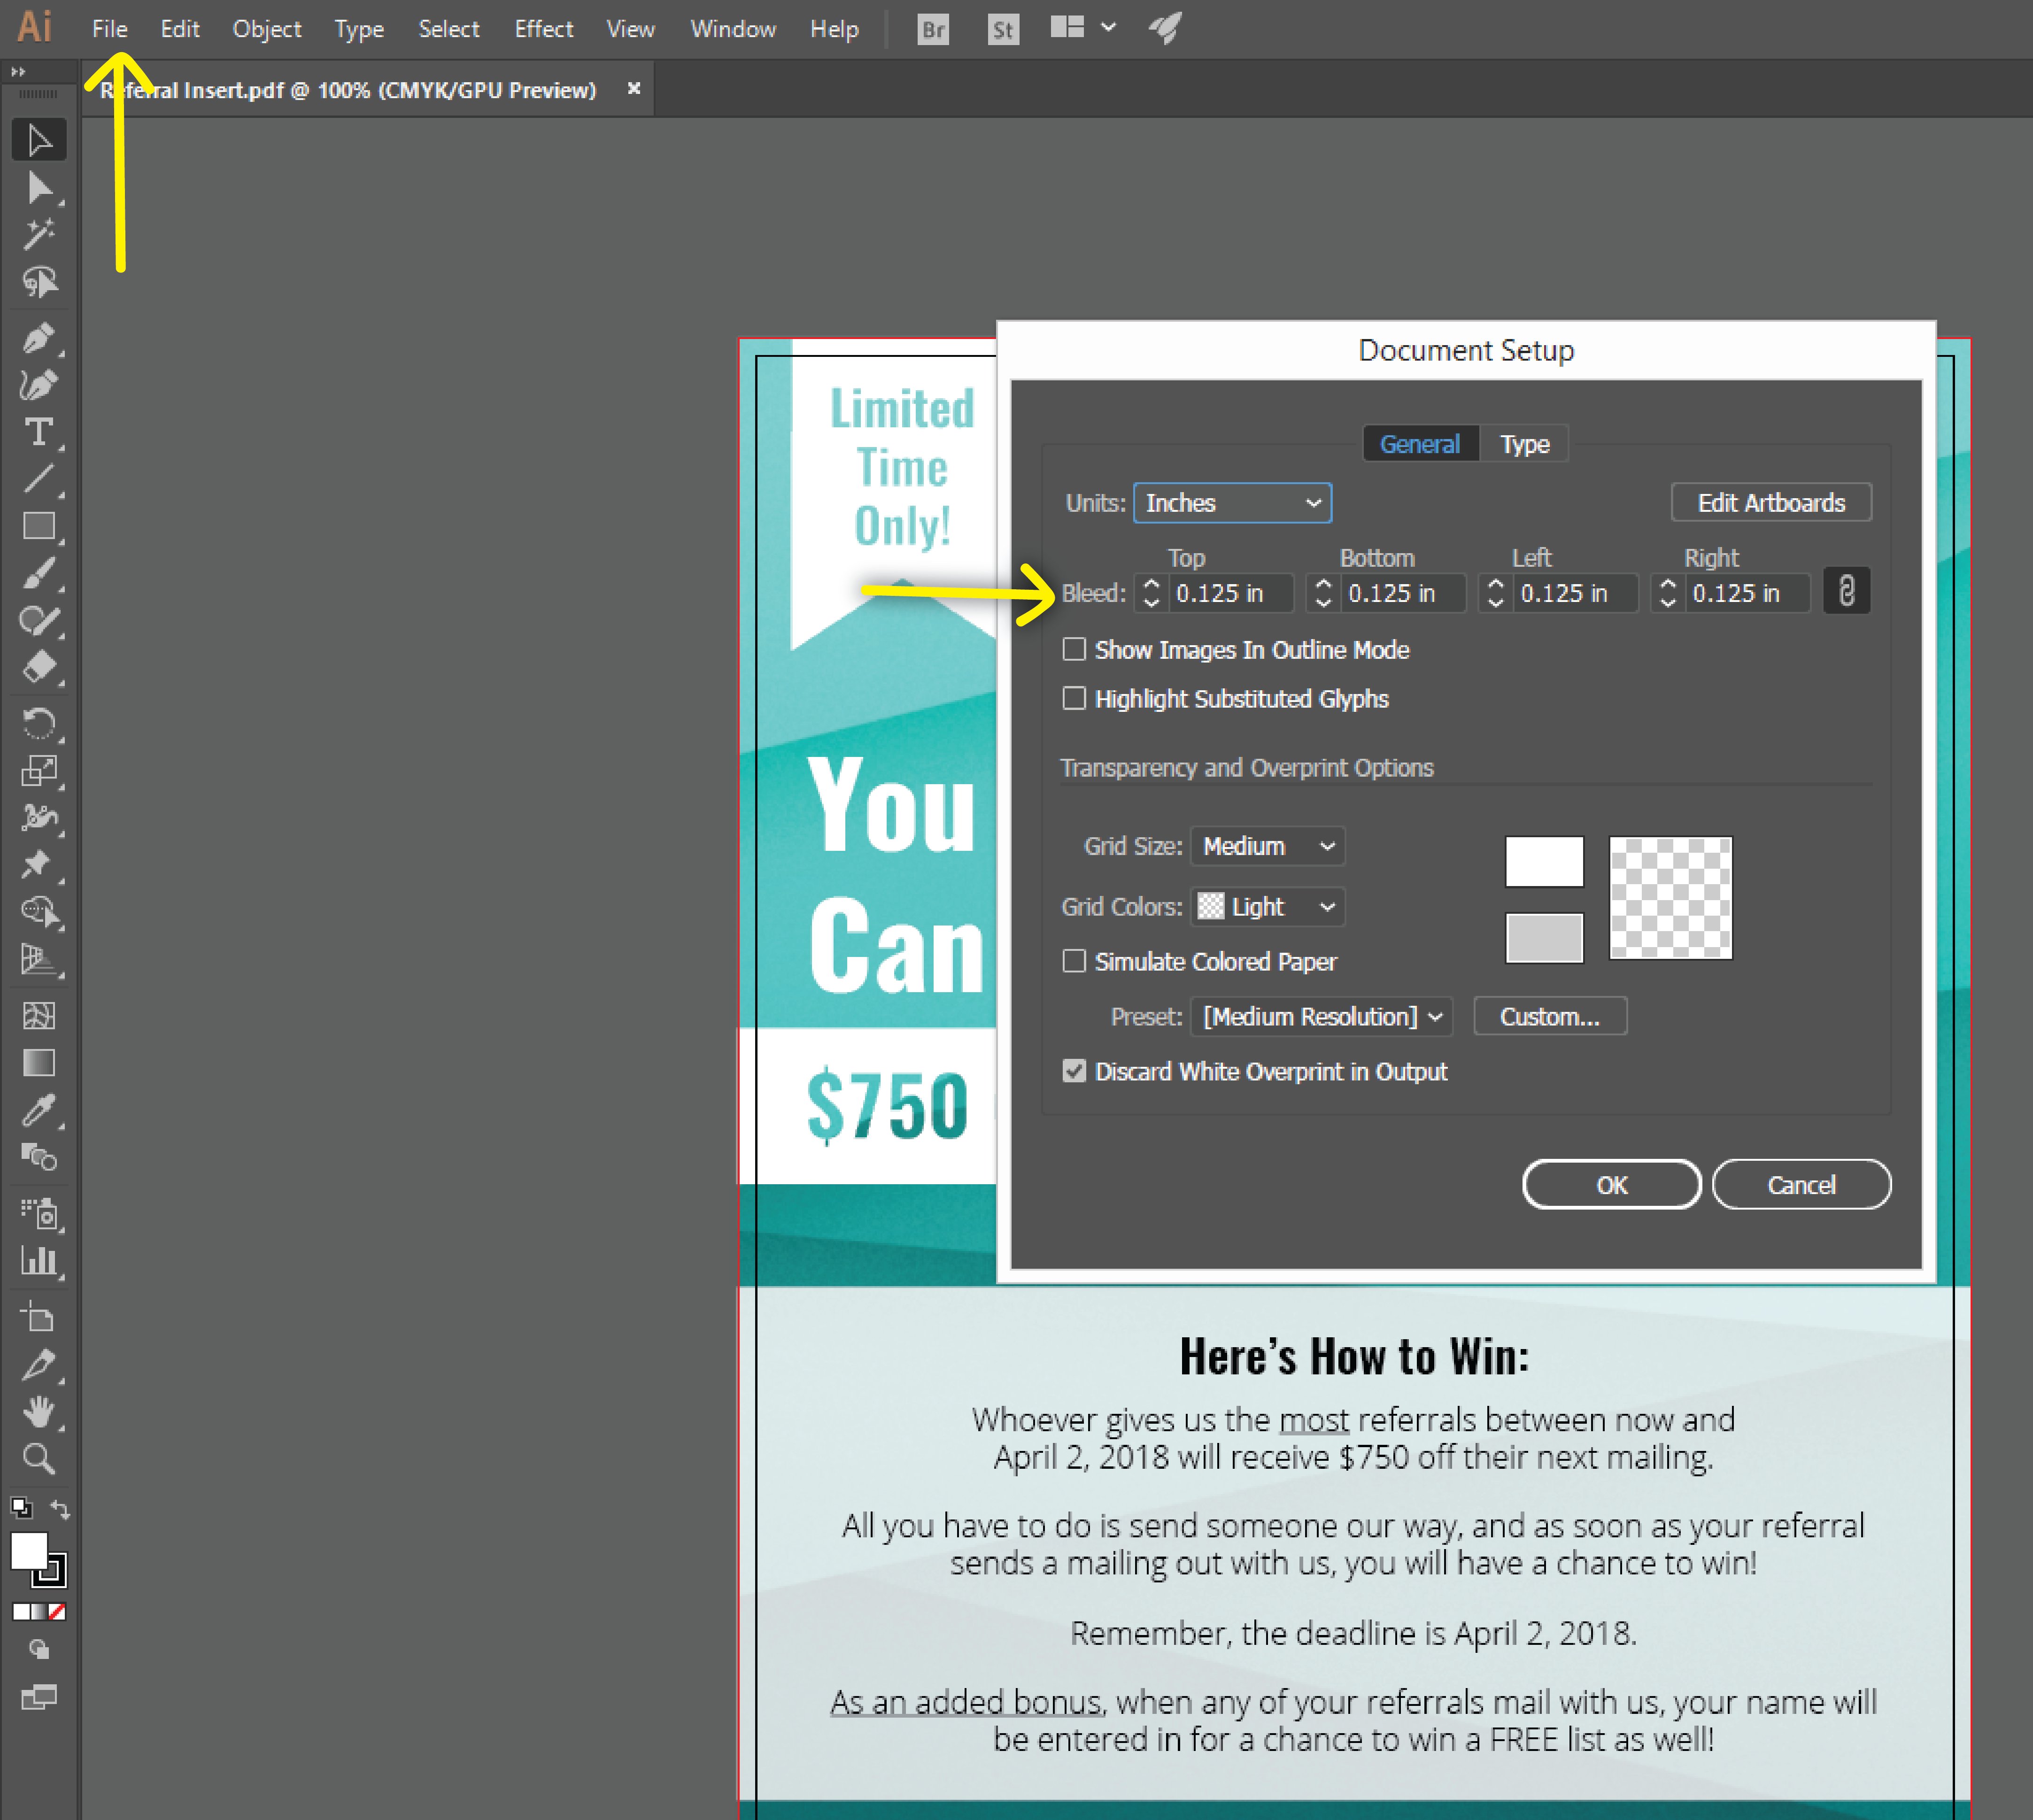
First, before you or your graphic designer begin designing, be sure to add an extra ⅛” to each side of your artboard. For example, if you want to print a 6” x 11” card, set your artboard size to 6.25” x 11.25.” In popular design programs like Adobe Indesign or Adobe Illustrator, there’s a box you can click and the software will add a bleed border for you. Just go to “File,” then “document setup,” then add .125 in. to each side. But if you don’t have access to these tools, just be sure to add that extra ⅛” before placing any text, images, or color.
Here’s what setting up bleeds will look like in Illustrator or InDesign.
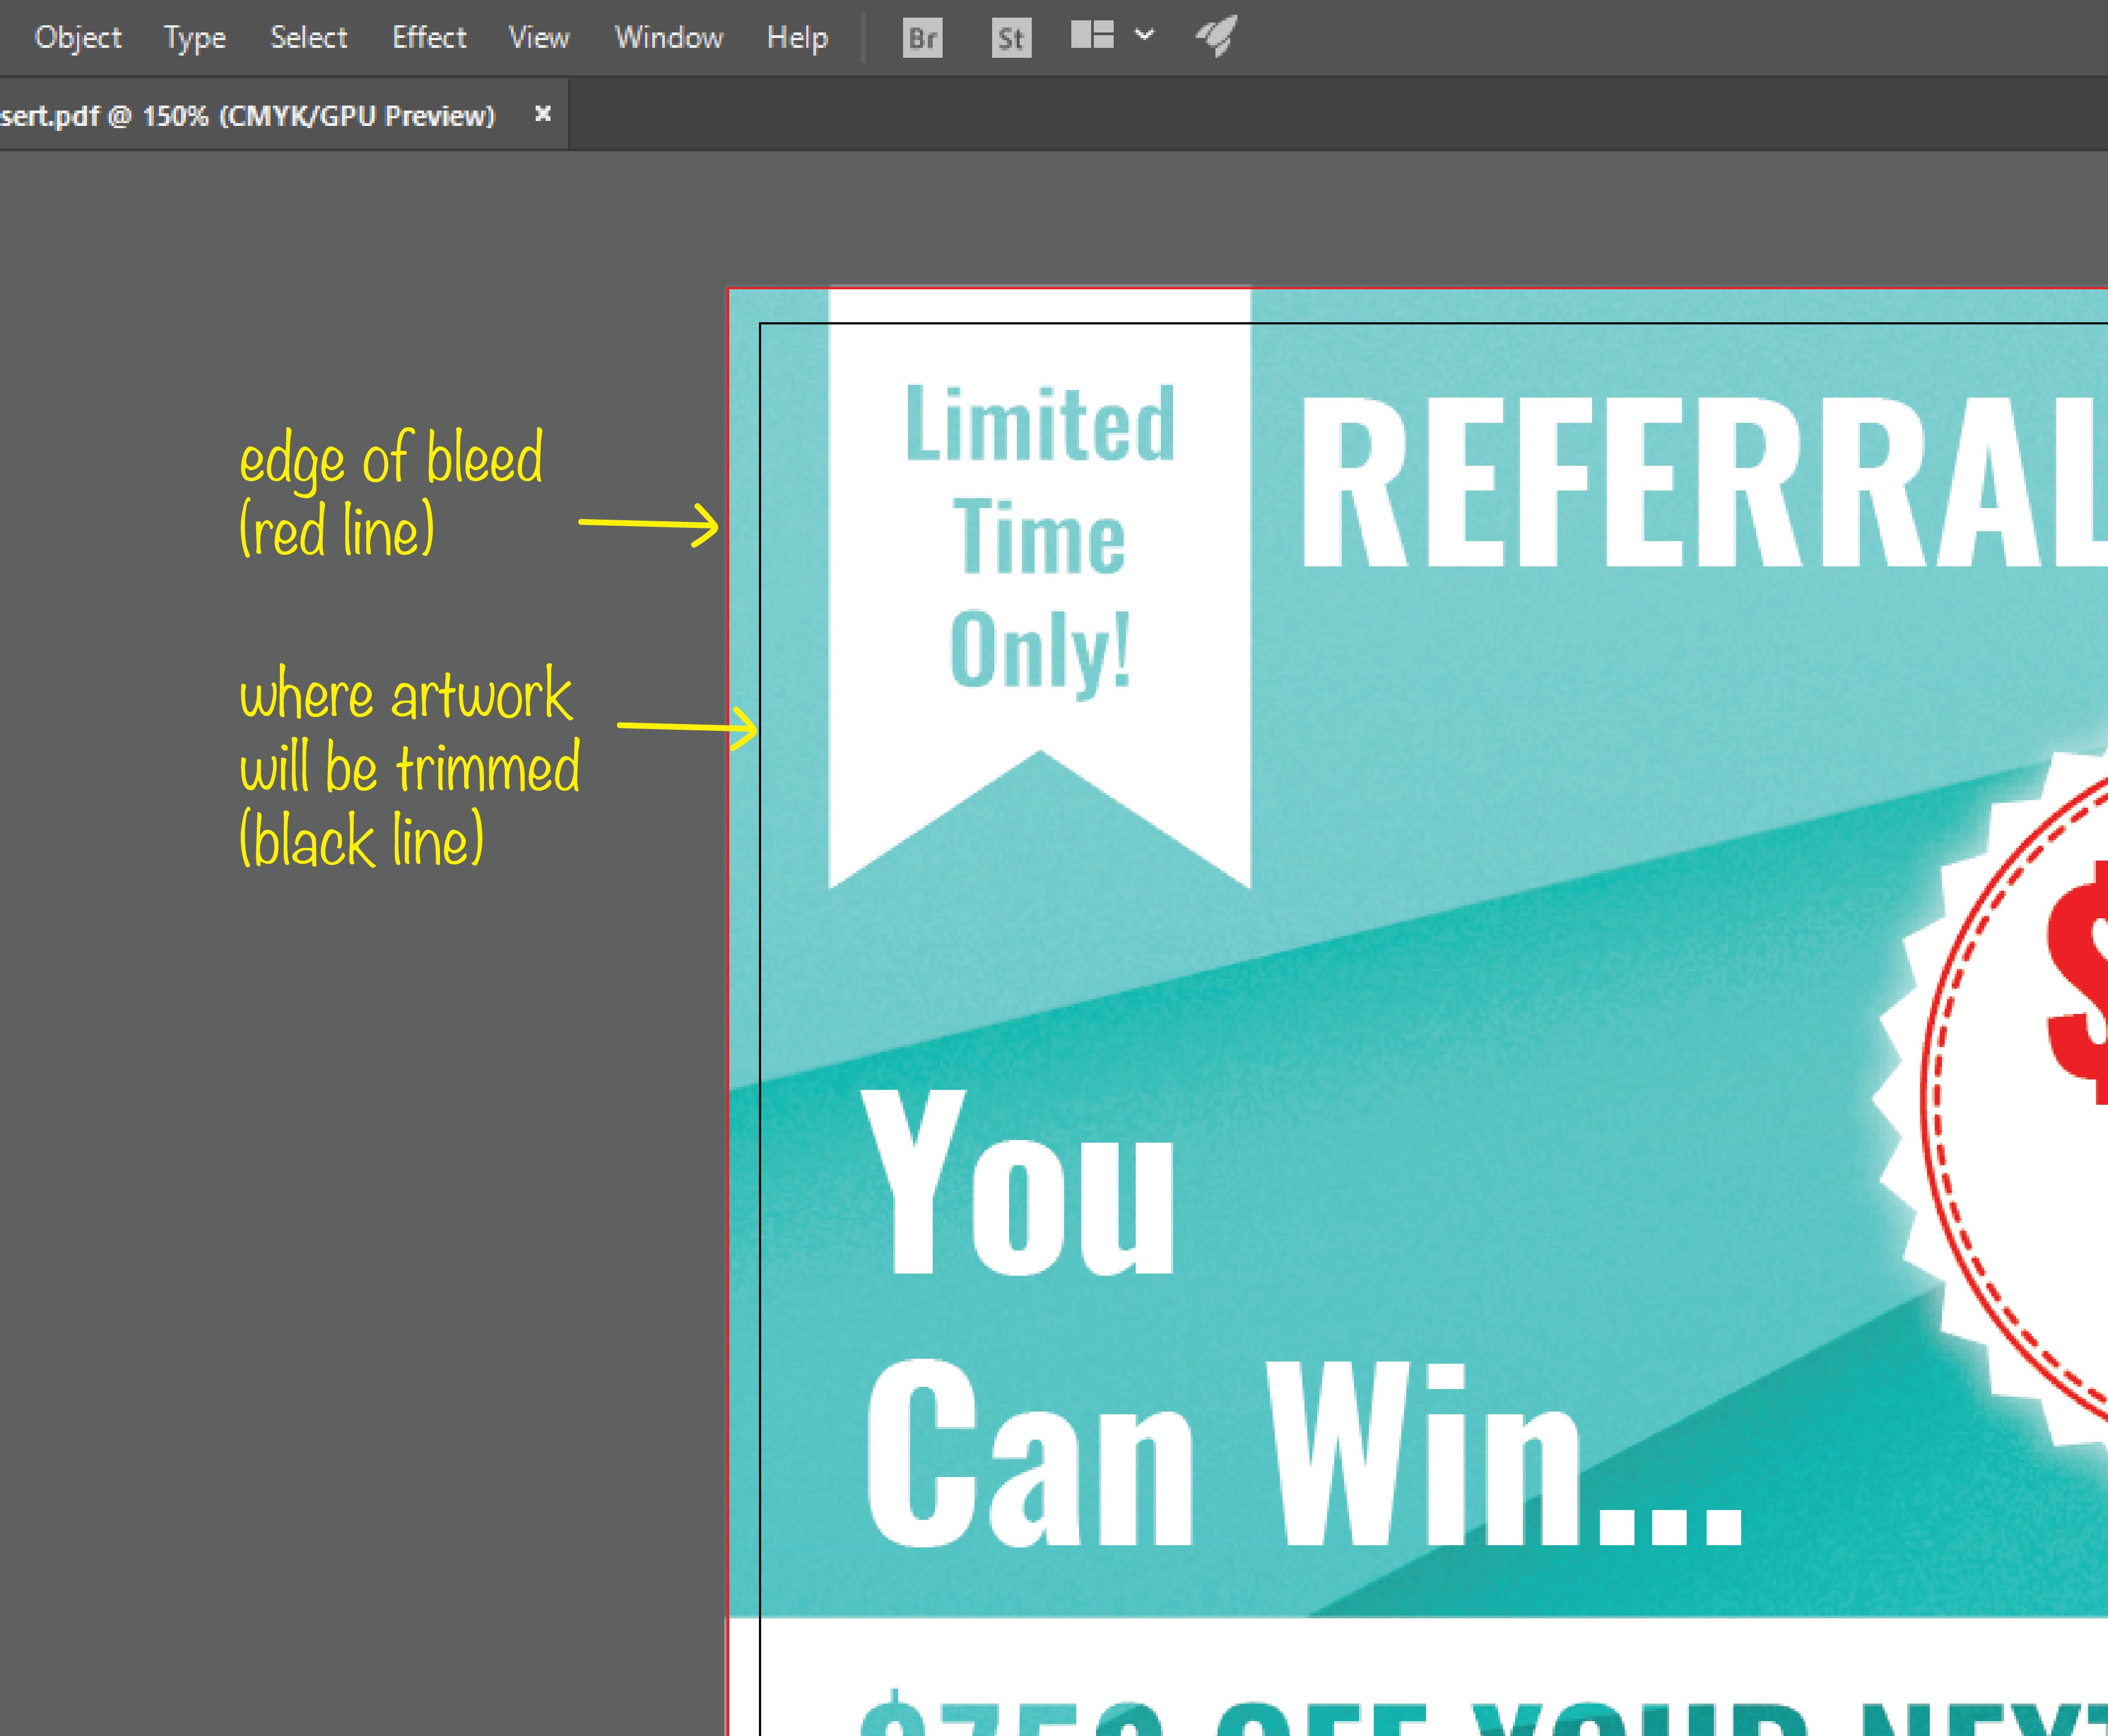
Second, keep everything inside the surrounding ⅛” border. Any art that goes outside the 6” x 11” border will be cut off when we trim. It’s especially important to keep all of your text within that original 6” x 11” border. One of the most common mistakes we see made is when someone stretches their entire artwork to the edge of the bleeds. You only need to stretch the background colors or images, not the text! However, if you do accidentally place something outside the border, we’ll tell you if we see a problem.
This is how your artwork should look like with bleeds set up correctly.
Third, when you’re ready to send the artwork, remind your customer service rep that you want your piece to bleed. He or she will tell our print manager, who’ll then set up the piece to print in the correct format for bleeds.
I hope we were able to demystify one of the most commonly asked questions that we get from customers: what are bleeds? If you have any confusion or need further clarification, don’t hesitate to contact us and one of our experts would be happy to chat with you.